Setup wizard
Back up first
Back up important files before you reinstall. Do not rely on Windows.old as your only backup.
Standard install (USB)
Came from Bootable USB + BIOS / boot order? The installer is already running start at step 1.
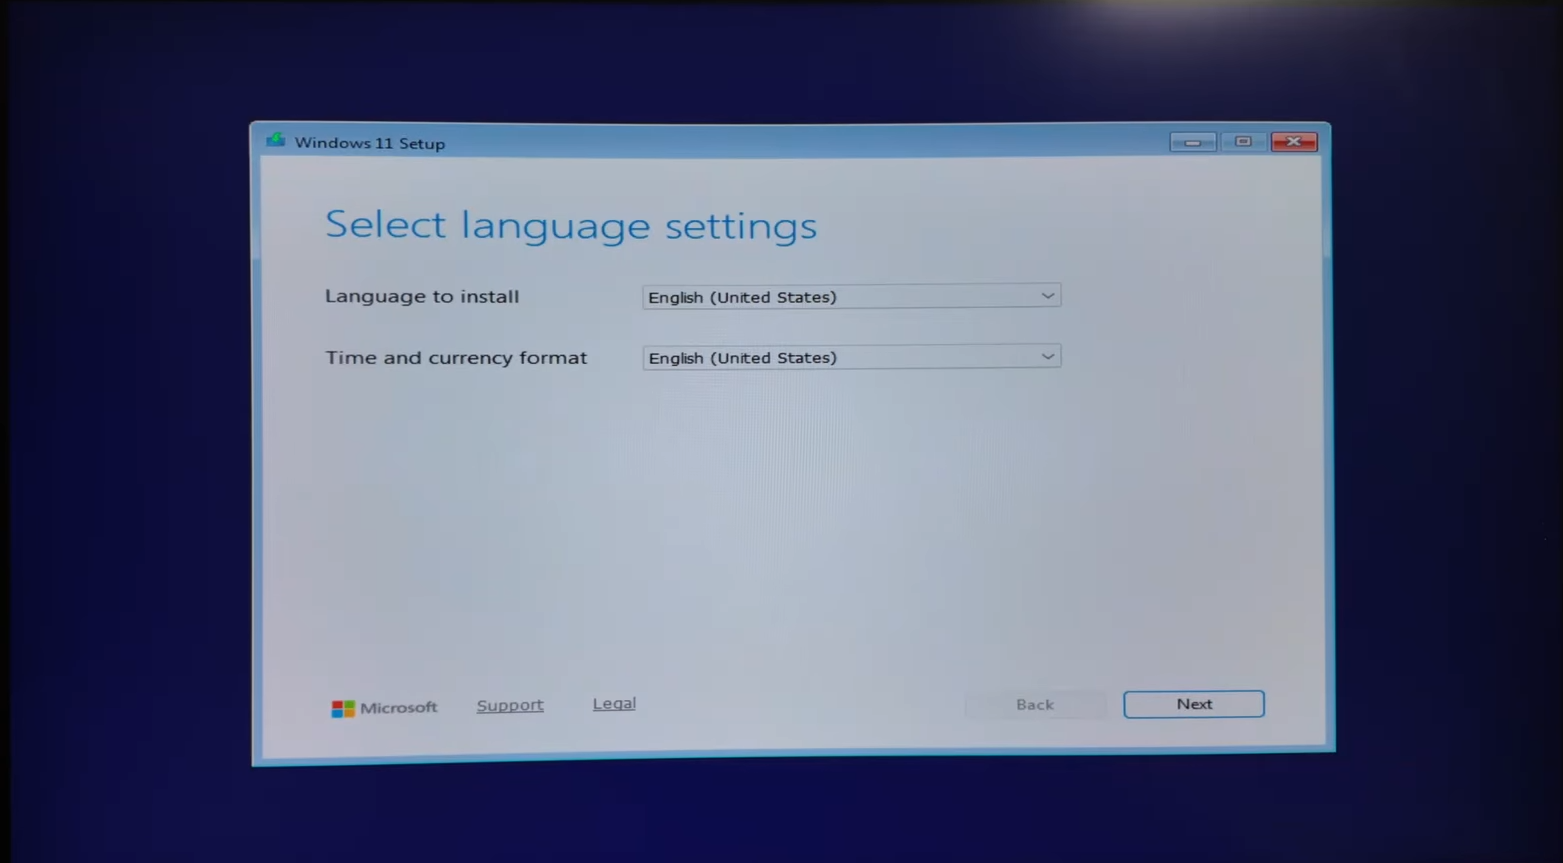
1. Select language settings
Choose your language and time format → Next.
2. Select keyboard settings
Choose your keyboard layout → Next.

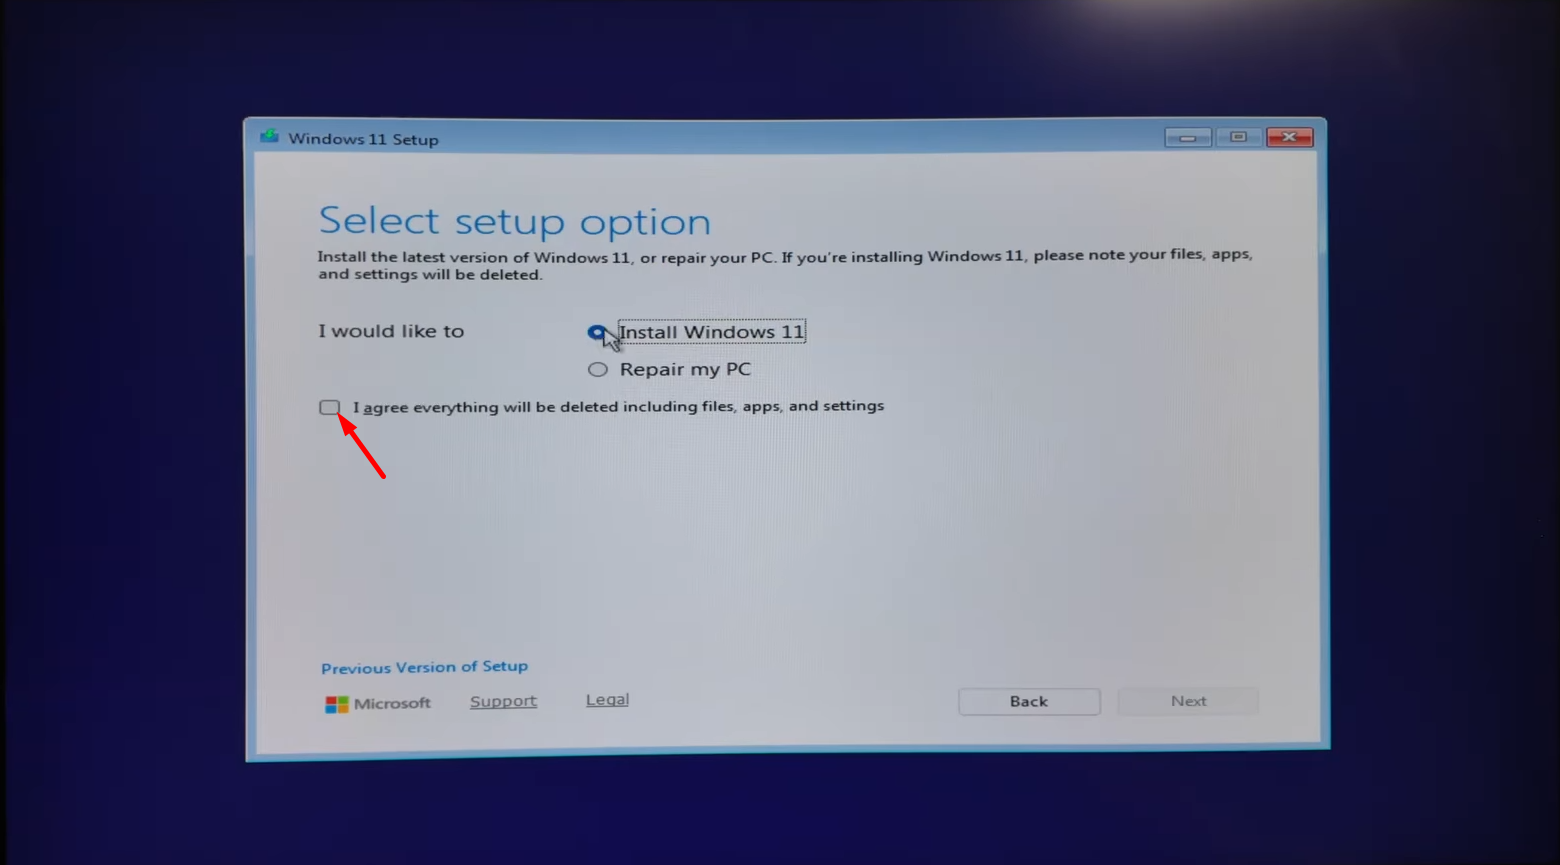
3. Select setup option
Select Install Windows 11 → check I agree everything will be deleted including files, apps, and settings → Next.
Previous Version of Setup
If you see Previous Version of Setup at the bottom, click it. The classic UI is easier for partitioning and gives you more control.
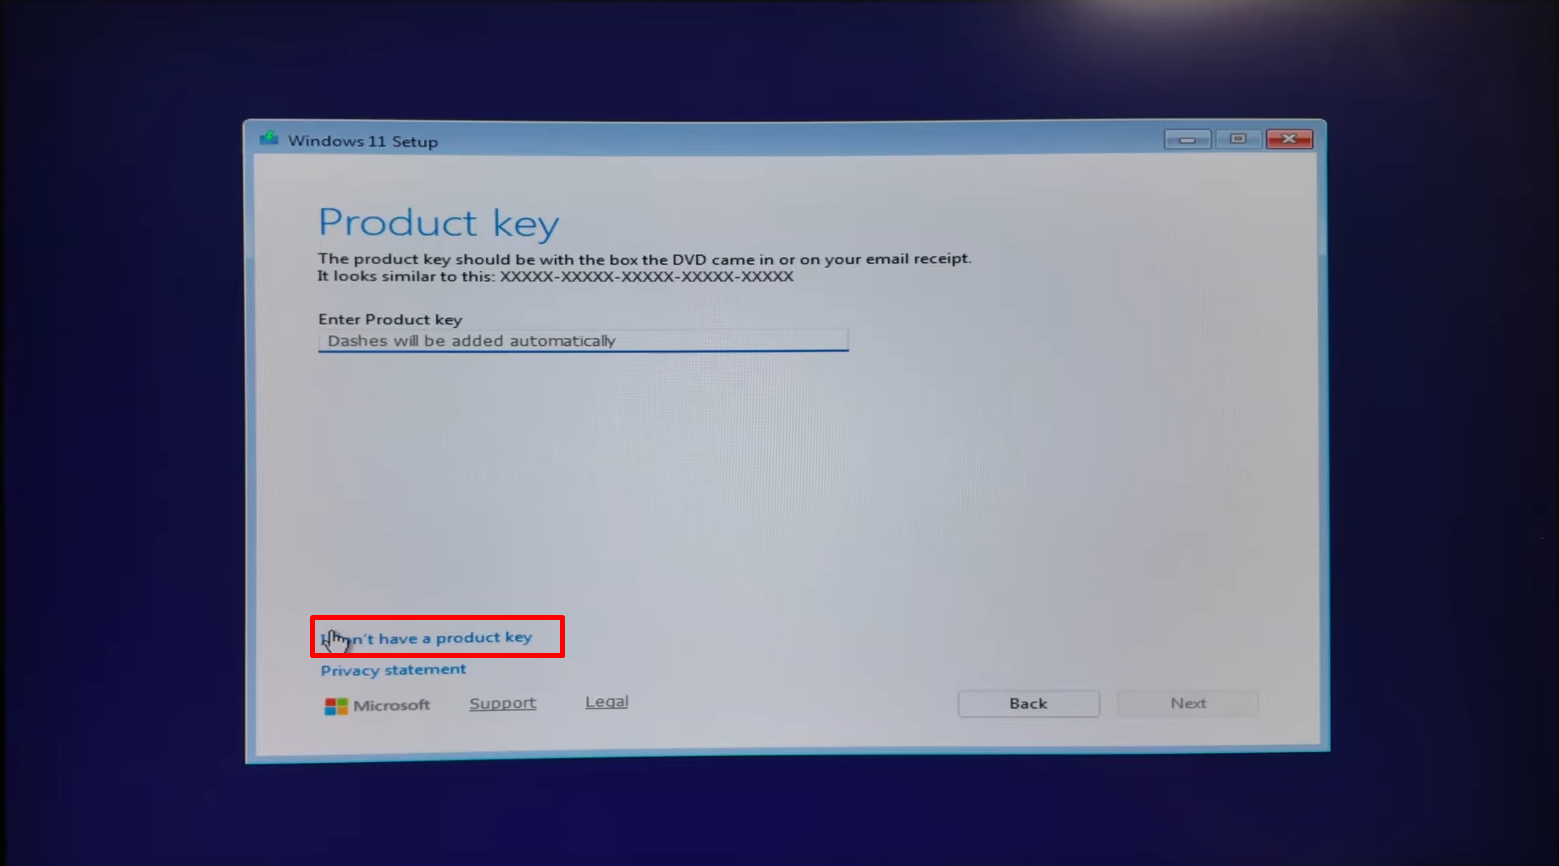
4. Product key
Click I don't have a product key. Windows reactivates automatically if this PC was previously activated.
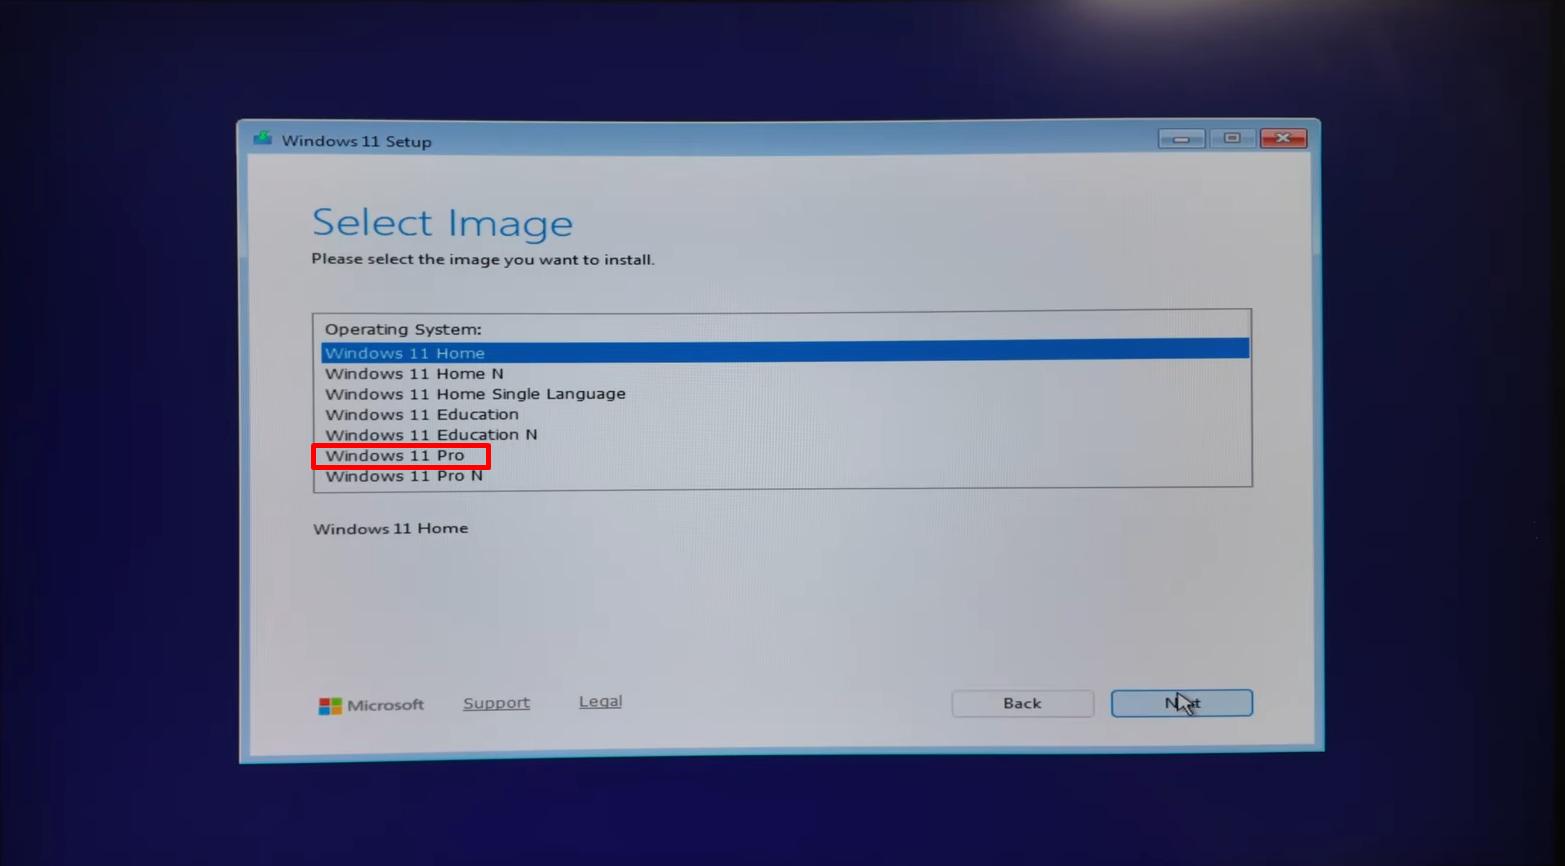
5. Select image (edition)
Select Windows 11 Pro → Next.
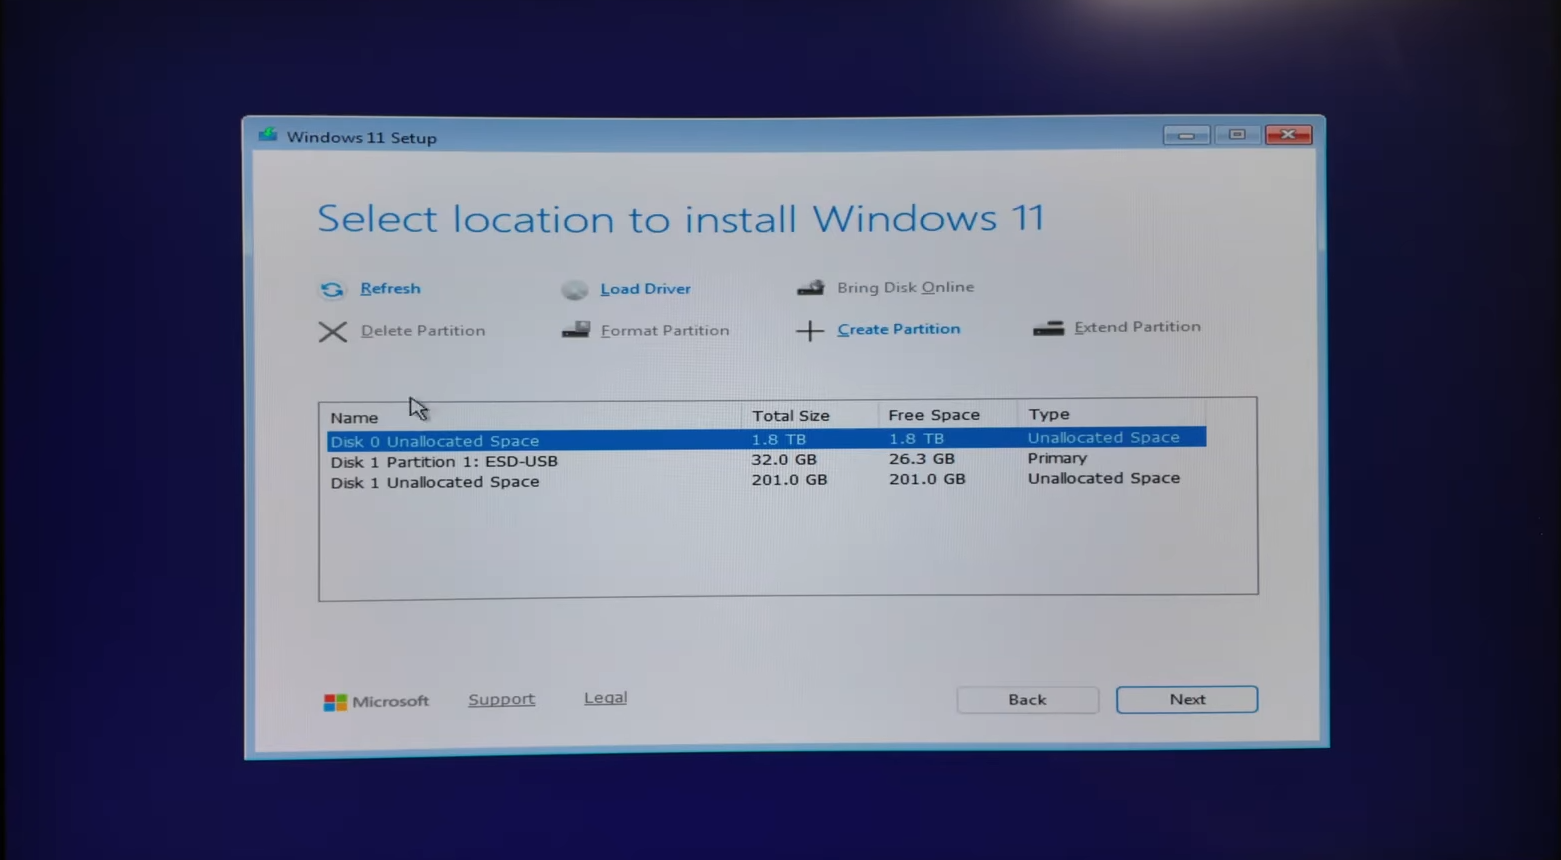
6. Select location to install Windows
Select the drive or partition where Windows should go → Next.
Select the partition by its size → Next → confirm the Windows.old warning.
Remove Windows.old later in First boot.
Delete every partition on the target drive one by one → select the resulting unallocated space → Next.
== Fresh install on all drives
DANGER
Erases every drive listed in setup.
Delete all listed partitions one by one → select unallocated space on the install drive → Next. :::
7. Ready to install
Review the summary → Install.
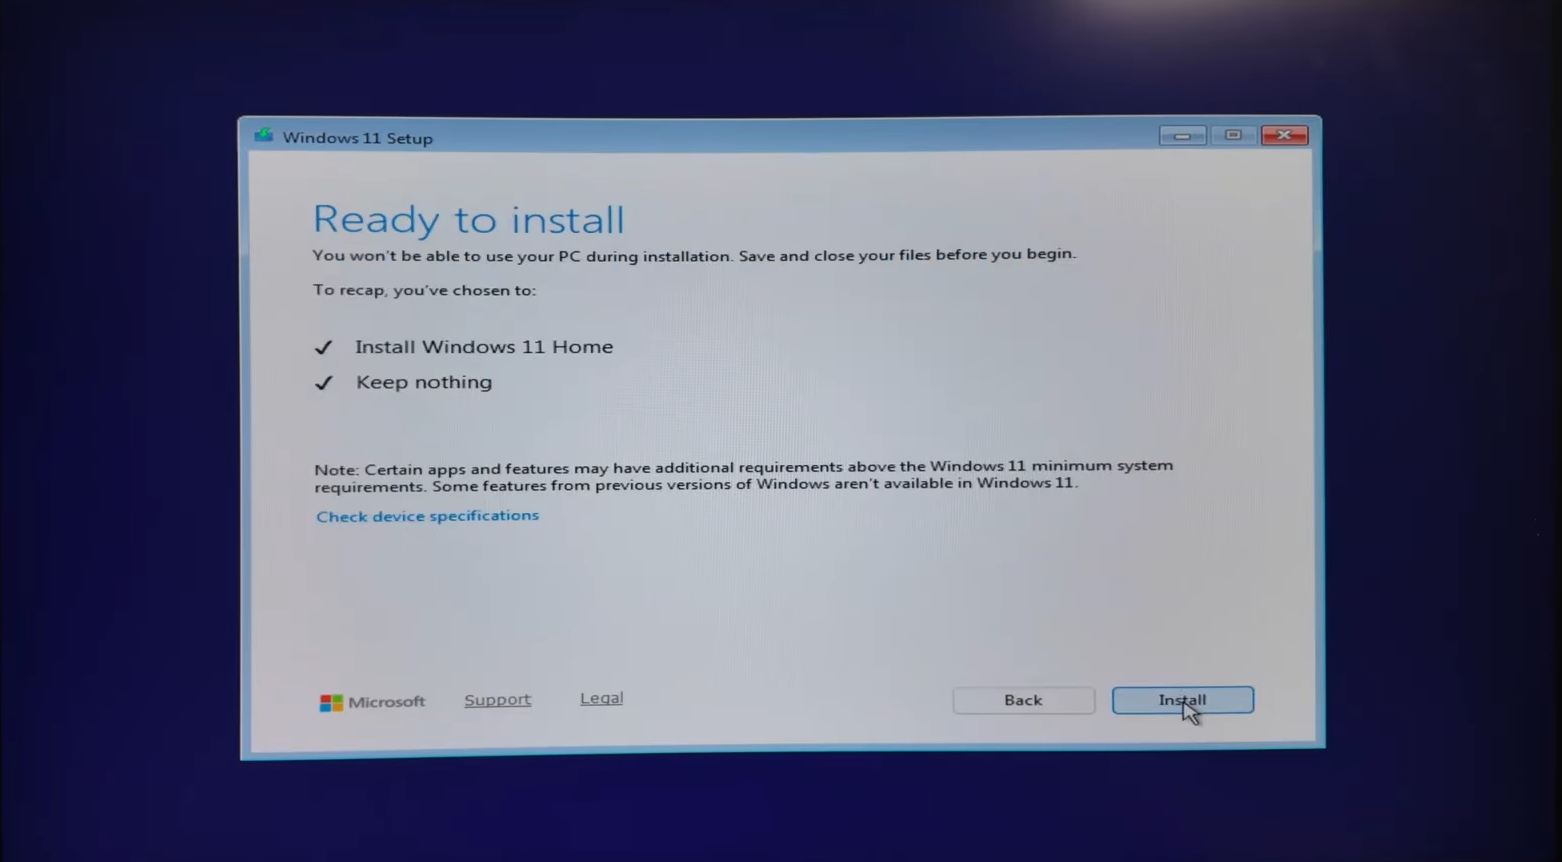
Wait for copying and reboots to finish, then continue with First boot.
Dual-boot without USB
Installs Windows on a new volume and adds a boot menu entry. Your current Windows stays until you remove it.
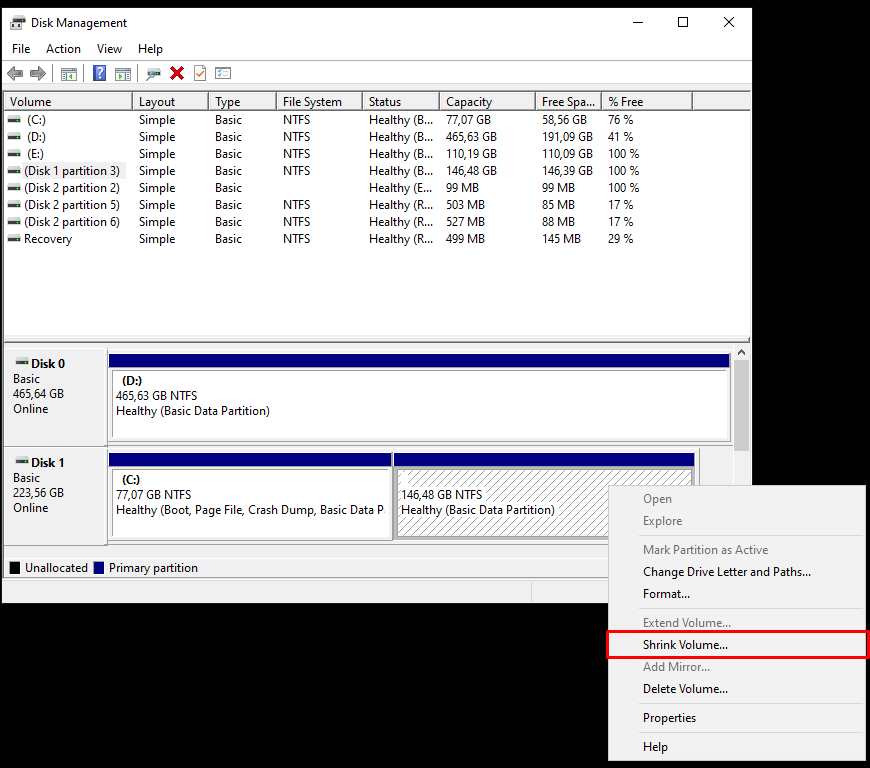
1. New volume (≥ 70 GB)
Disk Management asks for megabytes (MB). Pick how large the new Windows volume should be (minimum 70 GB), then copy the value into Enter the amount of space to shrink in MB.
Download Windows ISO.
Win+R→diskmgmt.msc→ Enter.Right-click the partition you want to shrink → Shrink Volume...
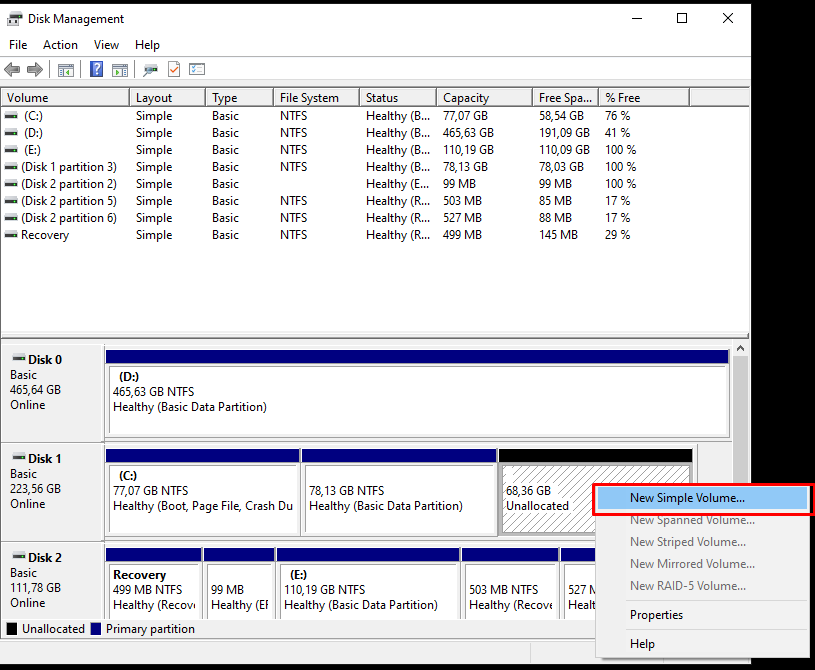
In Enter the amount of space to shrink in MB, paste the value from the calculator above (e.g. 70000 for 70 GB) → Shrink.

Right-click the new Unallocated space → New Simple Volume... → accept the defaults. Note the drive letter.
2. Optional: autounattend.xml
Copy autounattend.xml to the new volume root (e.g. E:\autounattend.xml) before running the script.
- Custom: Generate autounattend.xml files for Windows 10/11
- IBRA template: Download autounattend.xml right-click → Save link as if your browser still opens the XML. Copy to the volume root, then run the script. Edit it with the Unattend Generator (import or recreate your settings there). Review language, edition, and account settings before use.
Setup stops with "unexpected restart" error?
If autounattend.xml has incorrect or conflicting settings, you may see:
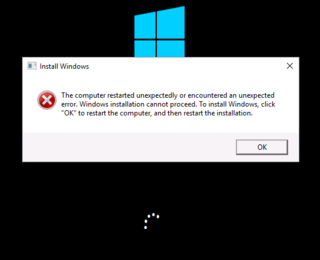
- Review every toggle in the Unattend Generator before you deploy.
- Check logs on the new install:
C:\Windows\PantherandC:\Windows\Setup\Scripts. - Microsoft: unexpected restart error during setup
Optional: first-run setup script
The IBRA autounattend.xml template already applies many similar tweaks. Use RunOnce.bat only if you skipped the answer file or want to run the same steps manually.
- Finish First boot and sign in to the new Windows.
- Download RunOnce.bat.
- Right-click → Run as administrator.
- The PC restarts in 10 seconds when it finishes.
What the batch file changes
Pauses Windows Update and driver installs via Windows Update, lowers telemetry, blocks Teams auto-install and device encryption, sets Arab Standard Time, adds en-US + ar-SA languages, disables UAC, trims a few services, then deletes itself and reboots.
3. Run windows-no-usb.ps1
Open PowerShell as Administrator:
irm 'https://docs.ibrhub.net/scripts/windows-no-usb.ps1' | iexBlocked? → PowerShell script blocked. Local copy: windows-no-usb.ps1
- Banner → press any key.
- Pick your Windows ISO, WIM, or ESD.
- Drive letter → type the letter from step 1 (e.g.
E) → Confirm.
TIP
Use only the new empty volume from step 1. Do not pick C: or any drive that has your files or an existing Windows install the script will overwrite that partition.
- Edition → select Windows version (e.g. Pro).
autounattend.xml→ Continue if you copied it in step 2, otherwise Skip answer.- Wait until Applying image finishes and the script says Completed.
- Reboot → pick the new Windows entry in the boot menu → First boot.
Split .swm images are not supported.
Credit
Based on iidanL/InstallWindowsWithoutUSB; IBRA uses windows-no-usb.ps1.